AI生成した3Dモデルのパイプライン⑥:ゲームモデルを想定しポリゴン削減、ベイクフロー
AI生成したモデルをゲームエンジンで利用できるようなパイプラインのプロトを作る。 一例です。


ポリゴンを減らしてテクスチャをベイクします。
今回は前回の記事
AI生成した3Dモデルのパイプライン⑤:プロシージャルコンバート
https://www.procedural.jp/articles/navdi35uh
で作成した内容のデータを実ゲームに入れるケースを想定し、
ポリゴン削減とテクスチャ生成を行います。
ローメッシュとハイメッシュの二つを用意する
不要なポリゴンを削減したメッシュを作成
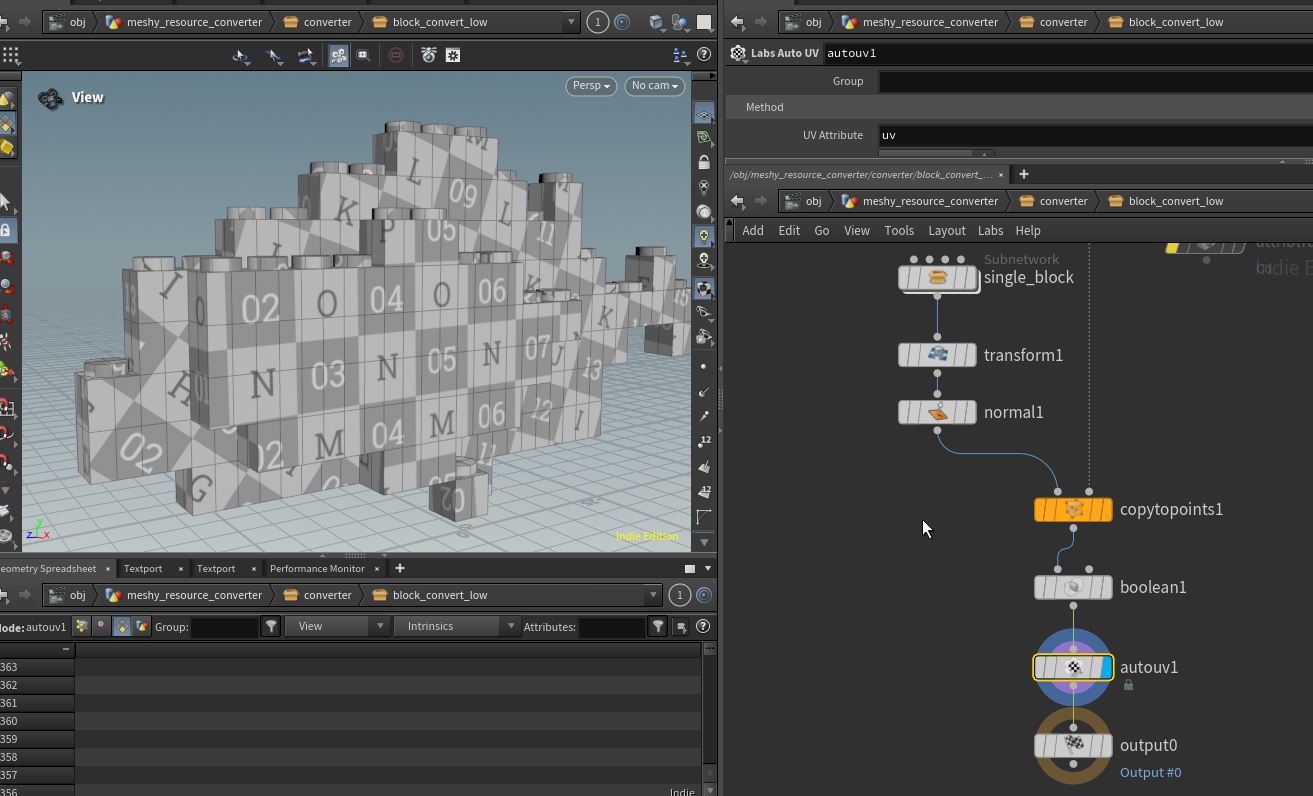
ローメッシュ用にベベルと下側の穴を開けない単一ブロックを作成し、
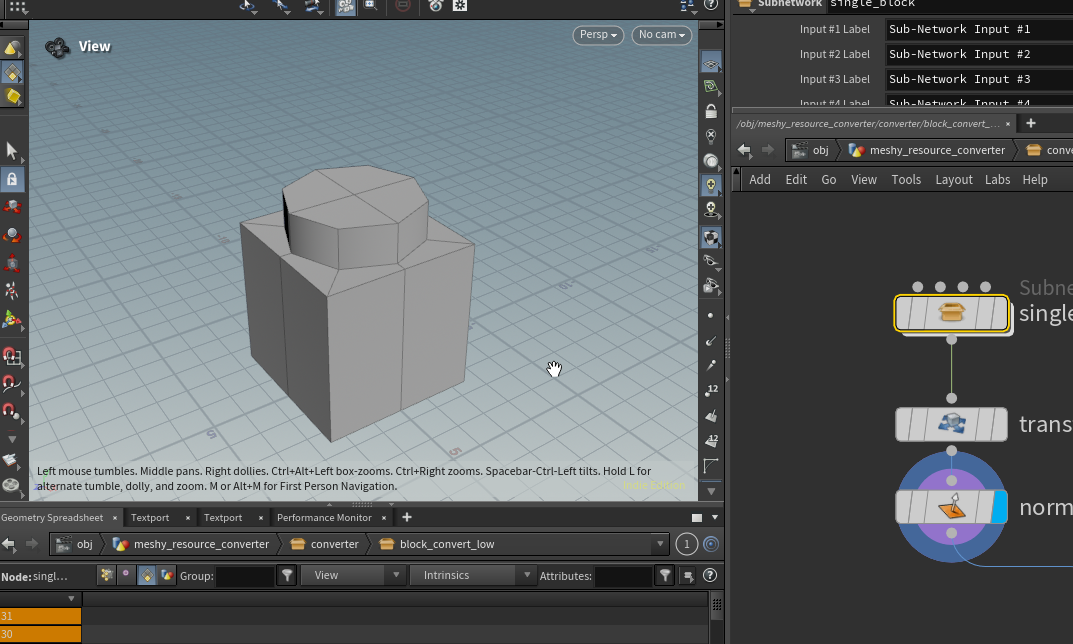
copy to pointで複製後にbooleanで重なっているメッシュを消し Labs Auto UVでuvを作成する
チュートリアルを反映させただけの状態だと30000ポリゴンほどあったメッシュがこのモデルの場合では1363ポリゴンになっています。
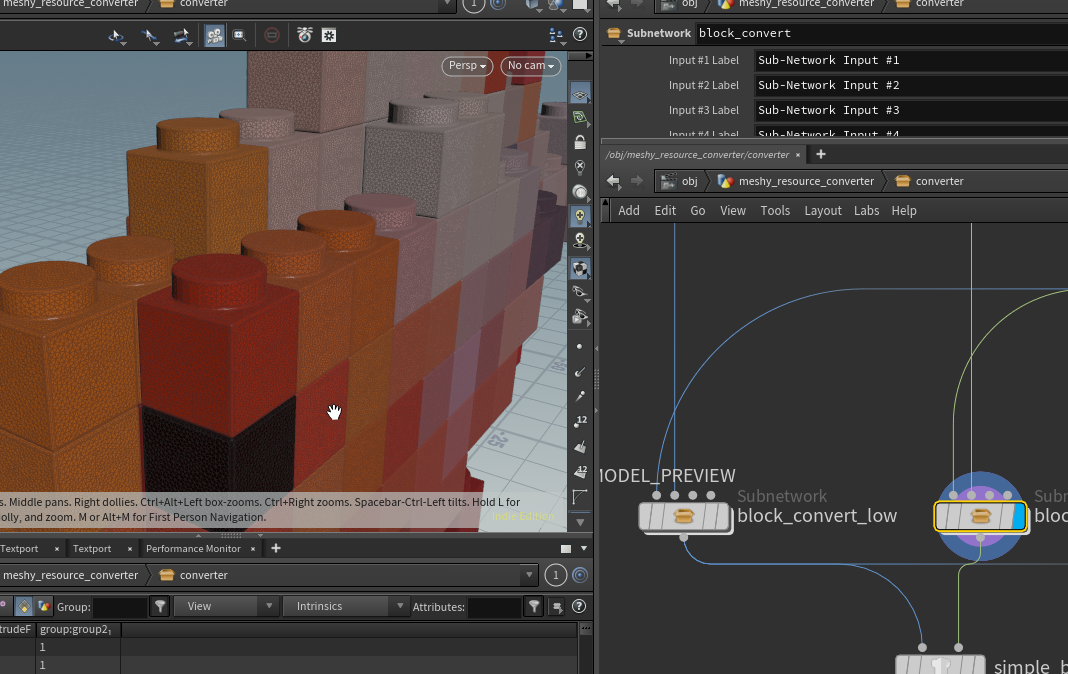
ハイメッシュの調整
ハイメッシュもnormalベイクに使うためにチュートリアルのままではなく少し調整しました。
上部の突起がチュートリアルだと分割数の調整が大変だったので作り方を調整、メッシュにもnormalノードで法線を設定しています。
テクスチャベイク
テクスチャをベイクするためにパスを生成しているPythonを調整
# directory pathアトリビュートから関連ファイルのアトリビュートを作成する
import os
import pathlib

node = hou.pwd()
geo = node.geometry()

root_directory_path = geo.attribValue("root_directory")
resource_directory_name = geo.attribValue("resource_directory_name")
resource_directory_path = f"{root_directory_path}/{resource_directory_name}"

export_root_directory_path = geo.attribValue("export_root")
path_instance = pathlib.Path(resource_directory_path)

# 入力ファイルのパスを取得
source_fbx_file_path = ""
source_tex_file_path = ""

for _path in path_instance.rglob(f"./*"):
    if not _path.is_file():
        continue
    suffix = _path.suffix
    if suffix == ".png":
        source_tex_file_path = str(_path)
    if suffix == ".fbx":
        source_fbx_file_path = str(_path)

# 入力ファイルのパスアトリビュートを作成
attrib_name = "fbx_file_path"
geo.addAttrib(hou.attribType.Global, attrib_name, "")
geo.setGlobalAttribValue(attrib_name, source_fbx_file_path)
attrib_name = "tex_file_path"
geo.addAttrib(hou.attribType.Global, attrib_name, "")
geo.setGlobalAttribValue(attrib_name, source_tex_file_path)

# 出力ファイルのパスを作成
export_directory_path = f"{export_root_directory_path}/{resource_directory_name}"
export_fbx_path = f"{export_directory_path}/{os.path.basename(source_fbx_file_path)}"
export_detail_json_path = f"{export_directory_path}/detail.json"

# SimpleBakerで作成されるテクスチャのパス
# SimpleBakerのパスはchannelごとに作成されるため、出力名を変更し場合、このノードと向こうのノード両方調整してください
export_tex_base_path = os.path.splitext(export_fbx_path)[0]
export_tex_path_bc = f"{export_tex_base_path}_bc.tga"
export_tex_path_nm = f"{export_tex_base_path}_nm.tga"

# 出力先のパスアトリビュートを作成
attrib_name = "export_directory_path"
geo.addAttrib(hou.attribType.Global, attrib_name, "")
geo.setGlobalAttribValue(attrib_name, export_directory_path)
attrib_name = "export_fbx_file_path"
geo.addAttrib(hou.attribType.Global, attrib_name, "")
geo.setGlobalAttribValue(attrib_name, export_fbx_path)
attrib_name = "export_tex_base_path"
geo.addAttrib(hou.attribType.Global, attrib_name, "")
geo.setGlobalAttribValue(attrib_name, export_tex_base_path)
attrib_name = "export_tex_path_bc"
geo.addAttrib(hou.attribType.Global, attrib_name, "")
geo.setGlobalAttribValue(attrib_name, export_tex_path_bc)
attrib_name = "export_tex_path_nm"
geo.addAttrib(hou.attribType.Global, attrib_name, "")
geo.setGlobalAttribValue(attrib_name, export_tex_path_nm)
attrib_name = "export_detail_json_file_path"
geo.addAttrib(hou.attribType.Global, attrib_name, "")
geo.setGlobalAttribValue(attrib_name, export_detail_json_path)

LabsSimpleBakerを作成し、ローメッシュ、ハイメッシュを接続し、パスをPythonで作成したものに変更。
今回はbasecolorとnormalを作成する。
(以前Karmaを使ったベイクを紹介しましたが元データがベイクしづらいものでなければこちらの方が楽です)

ベイクしてみてテクスチャがコンバート後ディレクトリに作成されていれば想定通り
.png)
レンダリングの調整
コンバート後のモデルはレンダリングしたBaseColorとNormalを割り当てられるようにする。
コンバート後モデル用のマテリアルを作成し、
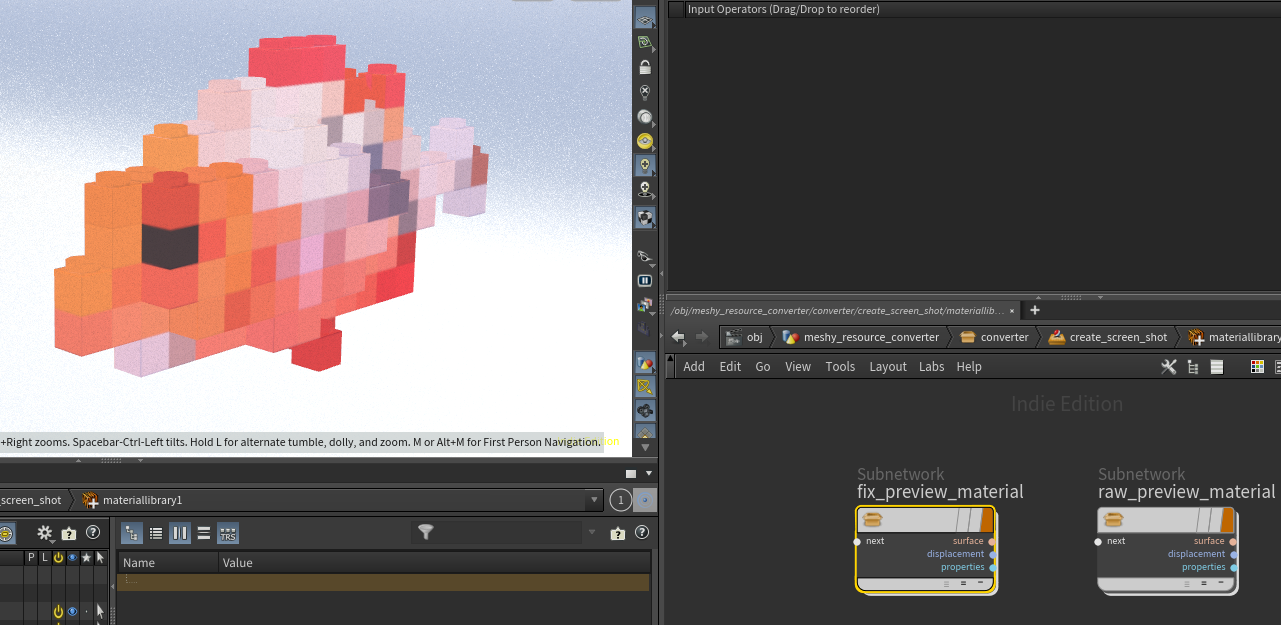
SimpleBakerから出力されるパスを設定する。
normalMapは Vector3で入力し、MtlxNormalノードを接続してtanget normalに変換する
(参考:https://www.sidefx.com/docs/houdini/nodes/vop/mtlximage.html)
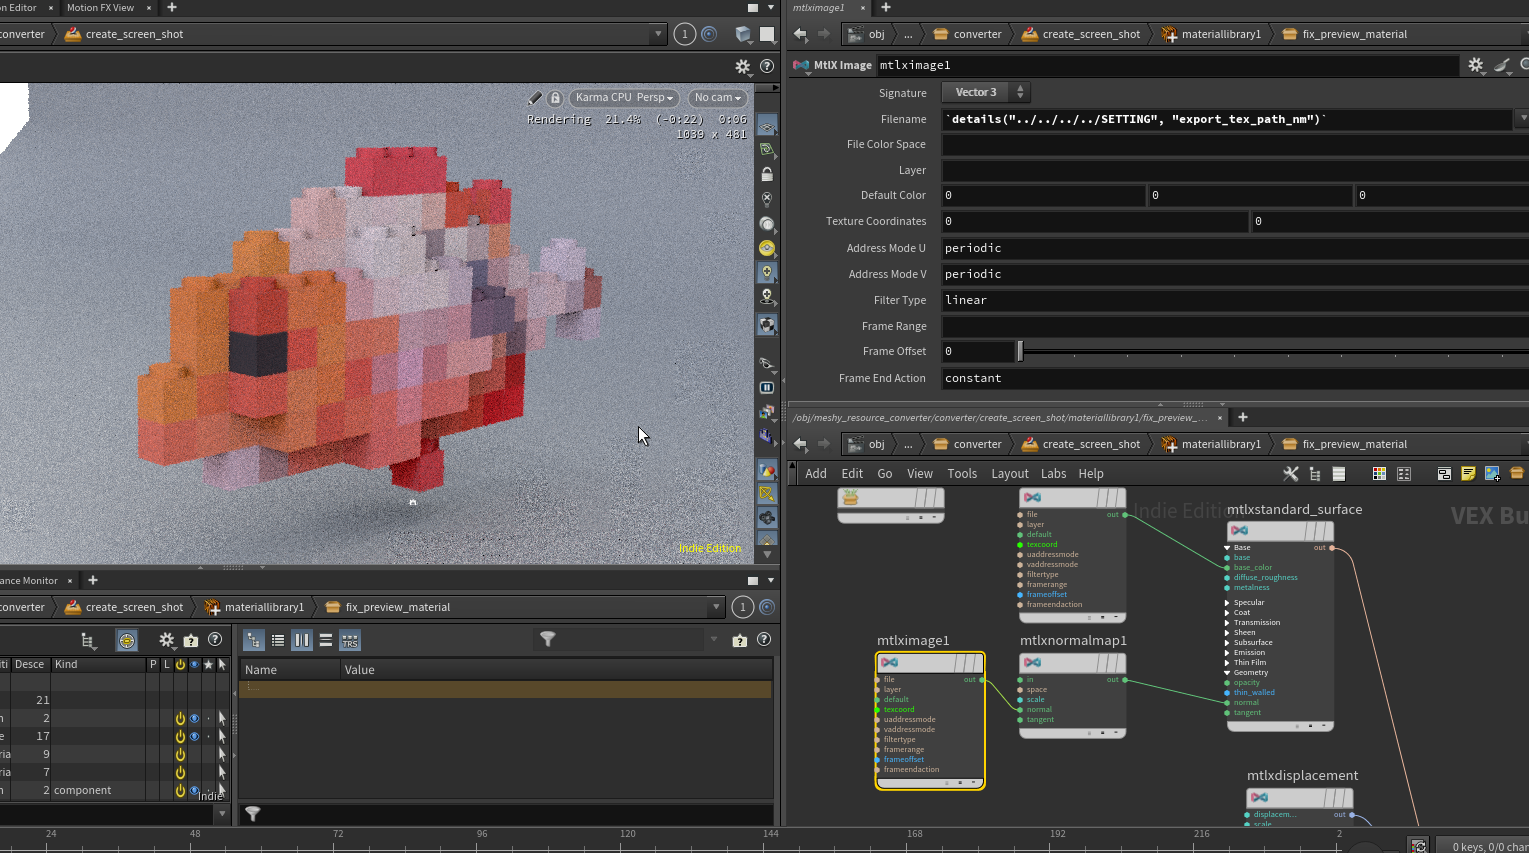
パイプライン調整
TOPにRopFetchを作成し、SimpleBakerを紐づける SimpleBakerを指定するだけでRopFetchは想定通りに動作してくれる。

(うろ覚えの記憶ですが、renderコマンドを紐づけられているノードはRopFetchで指定できるみたいな動作だったと思います。
SimpleBakerは定義されており、RopFetchで指定するだけで動作します。)
リスト化
リスト化のPythonも少し調整し、テクスチャがリストに含まれるように変更
"""
作成した画像ファイルとjsonデータをまとめた表を作成する
"""
import os
import json

from PIL import Image
import openpyxl
from openpyxl import styles
from openpyxl.utils import get_column_letter
from openpyxl.drawing import image


def create_summary_sheet(root_directory_path: str):
    """画像ファイルとdetail.jsonをまとめたExcelシートを作成する

    Args:
        root_directory_path (str): ルートディレクトリのパス
    """
    workbook = openpyxl.Workbook()
    sheet = workbook.active

    # ヘッダー行の作成とスタイルの適用
    headers = ["名前", "生成モデル", "変換モデル", "生成モデルポリゴン数", "変換モデルポリゴン数",
               "basecolor", "normal"]
    sheet.append(headers)
    header_font = styles.Font(bold=True)
    header_fill = styles.PatternFill(start_color="AFCDAF", end_color="AFCDAF", fill_type="solid")
    for col_num, header in enumerate(headers, 1):
        cell = sheet.cell(row=1, column=col_num, value=header)
        cell.font = header_font
        cell.fill = header_fill

    # 罫線のスタイル定義
    thin_border = styles.Border(right=styles.Side(style="thin", color="000000"))
    thick_border = styles.Border(bottom=styles.Side(style="thick", color="000000"))

    # 0行目と1行目の間に太い線を引く (ヘッダー下)
    for col_num in range(1, len(headers) + 1):
        sheet.cell(row=1, column=col_num).border = thick_border

    # ヘッダーの固定
    sheet.freeze_panes = "A2"

    row_num = 2  # データ書き込み開始行

    # ルートフォルダ内の各ディレクトリを走査
    for model_dir_name in os.listdir(root_directory_path):
        model_dir_path = os.path.join(root_directory_path, model_dir_name)

        # モデルディレクトリであるか確認
        if os.path.isdir(model_dir_path):
            image_files = sorted([f for f in os.listdir(model_dir_path)
                                  if f.lower().endswith((".png", ".jpg", ".tga"))])
            detail_file = os.path.join(model_dir_path, "detail.json")
            detail_data = {}

            # 0列目の色調を変更
            first_col_cell = sheet.cell(row=row_num, column=1, value=model_dir_name)
            first_col_fill = styles.PatternFill(
                start_color="AFAFCD", end_color="AFAFCD", fill_type="solid") # Light Gray
            first_col_cell.fill = first_col_fill

            # 0列目と1列目の間に細い線を引く
            sheet.cell(row=row_num, column=1).border = thin_border

            # detail.json が存在する場合
            if os.path.exists(detail_file):
                with open(detail_file, "r", encoding="utf-8") as f:
                    try:
                        detail_data = json.load(f)
                    except Exception as e:
                        pass
            else:
                # detail.json が存在していない
                pass

            # 種類ごとに指定の列に画像を配置
            resized_images = []
            for i, image_filename in enumerate(image_files):
                if image_filename.endswith("raw.jpg"):
                    # 元モデルのレンダリング画像
                    image_type = "raw"
                    image_index = 0
                elif image_filename.endswith("remesh.jpg"):
                    # 変換モデルのレンダリング画像
                    image_type = "remesh"
                    image_index = 1
                elif image_filename.endswith("bc.tga"):
                    # basecolor テクスチャ
                    image_type = "basecolor"
                    image_index = 4
                elif image_filename.endswith("nm.tga"):
                    # normal テクスチャ
                    image_type = "normal"
                    image_index = 5
                else:
                    # その他の画像が見つかった場合はスキップ
                    continue

                image_path = os.path.join(model_dir_path, image_filename)
                col_num = 2 + image_index  # B列から配置

                try:
                    # スプレッドシート用の解像度を変更したイメージを作成(併せてtgaをopenpyxlで扱えるようにpngにする)
                    base_name, ext = os.path.splitext(image_path)
                    resized_image_filename = f"{base_name}_thumbnail.png"
                    pil_image = Image.open(image_path)
                    resized_img = pil_image.resize((256, 256), Image.Resampling.LANCZOS)
                    resized_img.save(resized_image_filename)
                    resized_images.append(resized_image_filename.replace(os.sep, "/"))
                    # リサイズした画像をスプレッドシートに含める
                    img = image.Image(resized_image_filename)
                    target_width = 120
                    target_height = 90
                    img.width = target_width
                    img.height = target_height
                    anchor_cell = get_column_letter(col_num) + str(row_num)
                    sheet.add_image(img, anchor_cell)
                    sheet.row_dimensions[row_num].height = target_height * 1.2
                    col_letter = get_column_letter(col_num)
                    sheet.column_dimensions[col_letter].width = target_width / 7.0
                except Exception as e:
                    print(f"エラーが発生しました: {e}")

            # detail.json の特定のキーの値を書き込み
            source_polygon_num = detail_data.get("source_primnum", "")
            converted_polygon_num = detail_data.get("fix_primnum", "")
            sheet.cell(row=row_num, column=4, value=source_polygon_num)
            sheet.cell(row=row_num, column=5, value=converted_polygon_num)

            row_num += 1

    # 列幅の自動調整 (モデルディレクトリ名と特定キーの列)
    sheet.column_dimensions["A"].auto_size = True
    sheet.column_dimensions["D"].auto_size = True
    sheet.column_dimensions["E"].auto_size = True

    # ワークブックを保存
    output_excel_file = os.path.join(root_directory_path, "image_detail_summary.xlsx")
    workbook.save(output_excel_file)

# 実行例
root = "D:/resource/meshyai/lib"
create_summary_sheet(root)
パイプラインを実行しすべてのメッシュがコンバートされるのを確認。
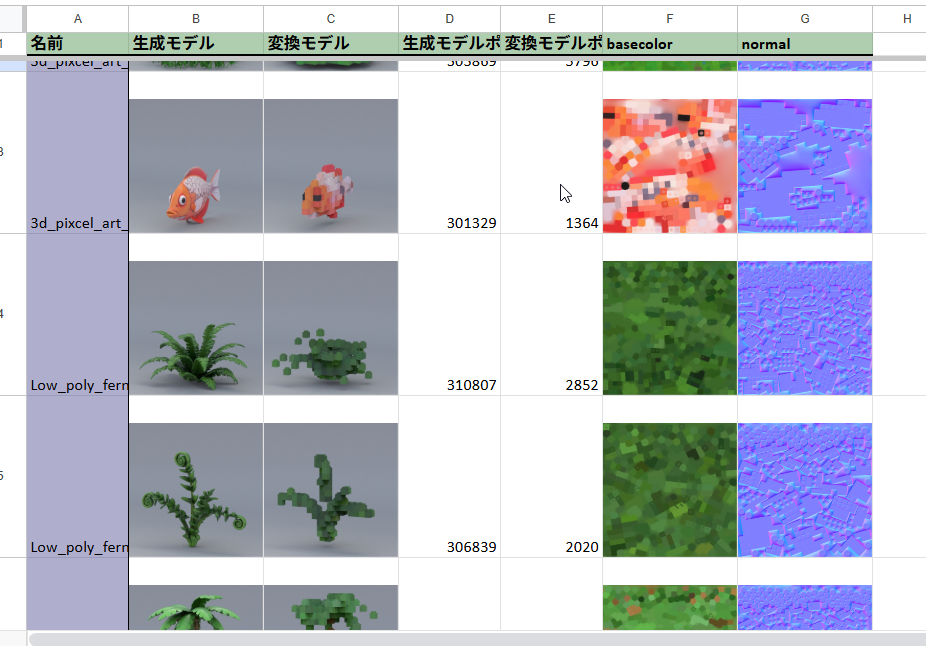
今回はコンバートデータ一覧のリストを公開します。
ご興味あれば見てみてください
ゲームモデルへコンバートする部分の大まかな流れが一段落しました。
ライブラリに含めるモデルを増やしたいと思います。

fish_ball
プロシージャル魚類